Diese Seite ist auch verfügbar in: English (Englisch)
In this next installment of the Tekton course, we’ll delve into a real-world business scenario, guiding through the
process step by step. Our journey will revolve around a straightforward Golang project hosted on GitHub. Leveraging the
robust infrastructure of Google Cloud Platform (GCP), we’ll craft a seamless CI/CD pipeline using Tekton on a managed
Kubernetes cluster. This hands-on approach will bridge theory with practical experience, offering a glimpse into the
challenges developers and engineers encounter in the cloud-native landscape.


1 Infrastructure setup
In this first article, we go start directly by creating a GCP account, installing and configuring the gcloud
command-line tool, and launching our first Google Kubernetes Engine (GKE) cluster in order to install Tekton on it.
2 Create GCP account
Before we can dive into GCP services like GKE, we’ll need to create a GCP account. Follow these steps:
1. Go to the GCP console: Navigate to the Google Cloud Platform console at https://console.cloud.google.com.
2. Sign up: If we don’t have a Google account, we’ll need to create one. If we do, sign in using existing credentials.
3. Complete the registration: Follow the prompts to complete the registration process. We need to provide billing information, but Google offers a free trial with a certain amount of credit to get started which is totally enough for testing purposes.
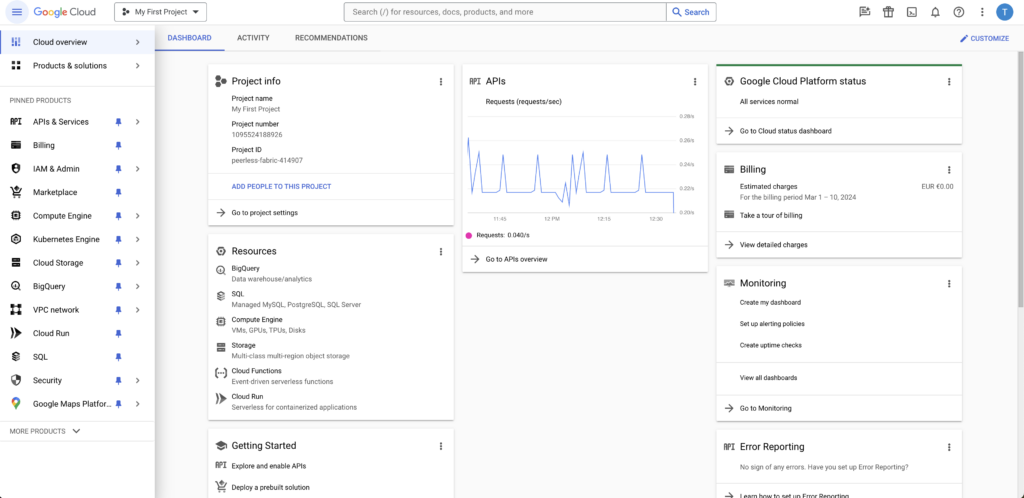
4. Open console: Navigate to the Google Cloud Platform Console at https://console.cloud.google.com and you should be able to navigate to all the services GCP offers. We won’t use the user interface but the gcloud cli.

3 Installing and configuring the gcloud CLI
The gcloud command-line tool is a powerful utility for interacting with GCP resources from the command line. Here’s how to get it set up:
1. Install the gcloud CLI: Visit the Install-page and follow the instructions for the operating system to download and install the CLI.
For mac users: We can install the Google Cloud SDK by executing the following commands in our terminal:
$ wget https://dl.google.com/dl/cloudsdk/channels/rapid/downloads/google-cloud-cli-464.0.0-linux-arm.tar.gz
$ tar -xzf google-cloud-cli-464.0.0-linux-arm.tar.gz
$ cd google-cloud-sdk/
$ ./install.sh
2. Login with gcloud CLI: We must initialize, so login with the gcloud cli in order to interact with the platform later on.
$ gcloud init
The wizard will guide through the process of setting up the CLI accordingly.
4 Using gcloud CLI
Now that we have the gcloud cli set up, let’s proceed with launching a GKE cluster:
1. Enable kubernetes engine api: Before creating a cluster, make sure the kubernetes engine api is enabled
$ gcloud services enable container.googleapis.com
2. Create a GKE cluster: Use the following command to create a GKE cluster with desired specifications
$ gcloud container clusters create tekton-cluster --zone=europe-west3-c --machine-type=e2-medium --disk-size=50GB
3. Install gke-gcloud-auth-plugin: Install the gke-gcloud-auth-plugin to enable authentication with the GKE cluster
$ gcloud components install gke-gcloud-auth-plugin
4. Set environment variable: Set the environment variable to enable gke-gcloud-auth-plugin
# zshell
$ echo "export USE_GKE_GCLOUD_AUTH_PLUGIN=True" > ~/.zshrc

# bash
$ echo "export USE_GKE_GCLOUD_AUTH_PLUGIN=True" > ~/.bashrc
5. Get cluster credentials: Authenticate kubectl with your GKE cluster:
$ gcloud container clusters get-credentials tekton-cluster --zone=europe-west3-c
6. Verify configuration: Verify that the correct cluster configuration is set
$ kubectl config current-context
5 Install Tekton on GKE
To install Tekton on your GKE cluster, you can use the provided script. Ensure to replace the version numbers with
the most recent ones available to ensure you’re installing the latest version of Tekton.
#!/usr/bin/env bash

set -e

tekton_version="v0.52.0"
tekton_triggers_version="v0.25.3"
tekton_dashboard_version="v0.43.0"

kubectl config use-context gke_peerless-fabric-414907_europe-west3-c_tekton-cluster

kubectl apply --filename "https://storage.googleapis.com/tekton-releases/pipeline/previous/${tekton_version}/release.yaml"
kubectl apply --filename "https://storage.googleapis.com/tekton-releases/triggers/previous/${tekton_triggers_version}/release.yaml"
kubectl apply --filename "https://storage.googleapis.com/tekton-releases/triggers/previous/${tekton_triggers_version}/interceptors.yaml"
kubectl apply --filename "https://storage.googleapis.com/tekton-releases/dashboard/previous/${tekton_dashboard_version}/release-full.yaml"
After executing the script, you can verify that Tekton components are running:
$ kubectl get pods -n tekton-pipelines
$ kubectl get pods -n tekton-pipelines-resolvers

Congratulations! We’ve successfully set up a Google Kubernetes Engine (GKE) cluster, installed Tekton for CI/CD workflows,
and verified that Tekton components are running smoothly.
6 Save budget
Remember, if you no longer need the GKE cluster, you can shut it down to save on costs using the following command:
$ gcloud container clusters resize tekton-cluster --num-nodes=0 --zone=europe-west3-c -q
With Tekton installed, we’re now ready to start implementing Tekton pipelines for our example golang project.
First, lets start in the next article with the pipeline design.